
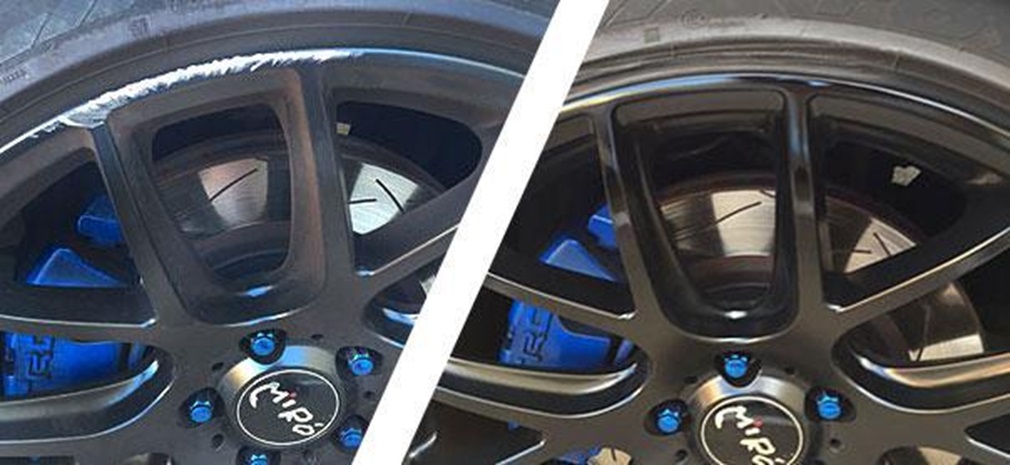
Curb rash can occur when you overestimate your space when parallel parking or when you bump a curb to avoid hitting something else. You will have to plan how to repair wheel rims otherwise it might become dangerous while driving.
Here’s what to expect if one of your wheels has scraped a curb and sustained damage.
Examine Your Tires For Possible Damage
Curb rash is damage to our tires rims caused by hitting curbs or other obstacles, creating scuff marks, scratches, and occasionally gouges. Even though curb rash is unattractive, it is treatable.
First and foremost, think about your own and your passengers’ safety. Do not attempt to drive on a seriously damaged tyre. Examine the sidewall of the tyre for signs of damage:
A bulge or blister in the sidewall shows that the tire’s structure has been severely damaged. If you see this, drive slowly to your nearest tyre shop to have the tyre replaced.
Even though scuffs and scratches are just superficial, they should be checked up by a tyre professional as soon as possible.
Tears in your tire’s sidewall – or gouges that have taken rubber – are usually a major source of concern. Because the sidewall is often the weakest section of a tyre, even minor damage should not be overlooked.
Any damage near the tire’s bead can cause the tyre to “pop” off the rims, so if you detect something, drive slowly to the tyre shop.
Tire sidewall damage, in general, necessitates tyre replacement. Tires are resilient, so unless there’s a lot of speed involved, a curb shouldn’t do much more than scuff them.
How To Repair Wheel Rims?
Follow the steps below to repair wheel rims.
STEP 1 Sand the scuffed rim regions with 80 grit sandpaper, then wash off the sanding dust and let dry.
STEP 2 Using a scraper, smooth out any gauges and indentations with filler. Filler can be applied by wiping with your finger if curved sections of the rim are depressed and too small to apply with an applicator. Allow for at least a half-hour of drying time. A fingernail should be pressed into the filling. The filler is dry if there is no nail impression.
STEP 3 Using 180 grit sandpaper, resand the surface, smoothing off any rough areas.
STEP 4 Using scotchbrite, scuff the whole wheel rim in preparation for the primer. After scuffing, the rim will appear to have a dull sheen. Before priming, wipe the wheel rim thoroughly.
STEP 5: Use a mask to hide the parts you don’t want to be primed. Placing playing cards between the edge of the rim and the tyre is a simple way to disguise the tyre. Playing cards are flexible enough to fit between the rim and the tyre and adjust to the curve of the wheel.
STEP 6 Apply a light coat of etching primer and let it dry, then apply a thicker second coat and let it dry as well.
STEP 7 Using short, even strokes, apply a layer of silver chrome. Allow for drying time.
STEP 8 Apply numerous layers of clear coat, beginning with a light coat and gradually increasing the thickness between drying intervals.
STEP 9 Remove all of the masking tape.
How To Prevent Wheel Damage?
There are alternative solutions to save your rims and avoid the exorbitant cost of curb rash repairs, aside from unrealistic preventative measures like never parallel parking or controlling all outside forces of traffic.
RimBlades and RimSavers were designed to enhance the look of your vehicle while also saving you money. RimBlades readily adhere to your alloy wheels and conform to provide protection. RimSavers offer an even higher level of long-lasting protection while also being simple to install.
Both materials come in a range of colours and improve the appearance of your vehicle. As you can see, protecting all of your wheels for $49.99 to $79.99 is far less expensive than fixing a damaged rim.